
Designing The Minimalist Belt
The Minimalist Belt took us two years to design. The winding path that took us from 2015 to 2017 saw us start with a wild initial prototype, enter a long hibernation period filled with other projects, and come back, reinvigorated, for a second deep dive into the design process.
Initial Prototypes
We wanted to push the design envelope, and the belt is a fairly traditional piece—how do you redesign a belt in a substantial, meaningful way? We went to work with our design explorations, testing shapes, and functions, and wild ideas for how to construct a belt. We spent a month working through these explorations, slowly refining them towards feasibility.


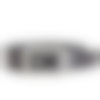
As with all good radical projects, we started with lasers. A belt strap cut with lasers, and with an integrated buckle (literally wrapped inside the strap), felt radical enough to be worth doing. We took our refined explorations and created and hand assembled an initial working prototype.
It certainly didn’t look like a traditional belt. After getting this far, however, we had to put the belt aside and pick up other projects. We were confident that we would return to it someday in the future, and imagined we’d continue riding the radical wave.
It certainly didn’t look like a traditional belt. After getting this far, however, we had to put the belt aside and pick up other projects. We were confident that we would return to it someday in the future, and imagined we’d continue riding the radical wave.
Hibernation
Hibernation can be beautiful—beneath the surface of indolence and rest, steady, productive work is being done. The belt was on the back burner for over a year, but each other project we tackled in turn gave us insights and experiences that informed our process.
"Ever-newer waters flow on those who step into the same rivers." - Hereclitus
A Year Older, a Year Wiser
We returned to the belt with new eyes, new ideas, and new motivation. The first prototype sat on the table in front of us.
We were getting ready to launch our all-leather bifold wallet. We had designed the wallet to be simple, functional, and to last for years—all attributes we realized were ideal in a belt. So we scrapped our initial explorations with the integrated buckle and laser cut strap. It was too complicated and we worried about it’s durability. Our team was focused in on designing a simple, durable belt.
During the year away, our Lead Designer Sean had the leather strap fail on two of his personal belts, one an heirloom piece from his grandfather and one from another belt manufacturer.


“The belt from my grandfather was an heirloom piece I was very fond of! I was sad when it failed, and took this experience into the next phase of belt design.”
SEAN KELLY
Lead Product Designer
The vast majority of belts are designed with the buckle secured to the belt, either through stitching or riveting. A leather strap, when properly cared for, can last a very long time. But a buckle can last almost indefinitely. Usually, when a belt strap goes, the buckle goes too. We shifted our focus to belts that solved this problem. While scouring stores and providers for different buckles, we stumbled across the Conway buckle.


“Kevin and I each bought a Conway, fashioned simple straps for it, and wore it around for weeks, to see how it worked.”
SEAN KELLY
Lead Product Designer
Conway buckles were originally used for securing saddles. They are designed to be strong and stable. Rather than having the sizing holes placed on the top layer of the strap, the holes for adjusting are located on the inner strap. When taking the belt on and off, you simply slide the top strap through the buckle and secure via a single hole that goes over the centrally located post.

The Conway style provides a clean aesthetic, as well as ensuring excellent durability—there are no moving parts, rivets, or stitches that can fail. And, if the strap fails, the buckle can easily be transferred to a new strap. We loved this.
Adopting the Conway-style buckle allowed us to make the strap using traditional leatherworking techniques. We outsourced this process to our partner in Portland, who has 45 plus years of traditional leatherworking experience, and who also manufactured our leather notebook covers.
We dove into the buckle.
A Refined Take on a Classic Form
We liked almost everything about the Conway style. Our goal was to give it a modern take and freshen the lines. When fastened, the traditional conway has a small sphere that protrudes from the center of the belt. That visual didn’t sit well with us. So we started by broadening the post into a rectangular shape, and moving it off center.The rectangular post looked more natural, and the location harkened to a classic buckle, where the tongue rests against one edge of the buckle.
With each of our products, we like to think of the visual relatedness to other items in our catalogue. With the buckle, we incorporated a number of features that are shared across our EDC product line, and even some of the curves and angles from our desk collection. We prototyped with lasercut acrylics, and then 3D printed steel for added strength so we could wear the belts to test them.


When we put them on, we realized that the asymmetric post location pays functional dividends as well—it gives better leverage for inserting and removing the belt!
Process Pivots
Initially, we planned to machine the buckle. But, the cost to machine the part quickly became prohibitive—too much material would be lost in the machining process. We considered two other options: going back to the 3D printing we had used in prototyping, or use investment casting, a new technique for us.
The quality of the 3D printing was excellent, but the cost was still too high for a production run. As the technology improves, the cost is rapidly decreasing—in the near future, it could be a very feasible, production grade, technology. But, not yet!
We turned instead to investment casting. We met with one of Ken’s friends who runs an investment casting studio nearby, and she showed us the in’s and out’s of the process.


Briefly—a mold is made of wax in the shape of the desired object. This is coated in ceramics. Once the ceramics are hardened, the wax is melted and removed, and molten steel is poured in it’s place. The steel cools and hardens, the ceramic mold is broken, and voila, a cast stainless steel buckle is left!
We searched across the United States to find a production grade casting factory to work with. What we found, instead, was a massive shortage of factories, extended lead times, and difficulty getting the our buckles to the quality and specifications we wanted.
We turned to a company in San Diego that works with a network of factories around the world, while handling the engineering and quality control in house. At a quicker turnaround time than the US manufacturers, they were able to cast our buckles at the highest quality, and at a price that fit with what our customers expect, with an investment casting factory they work with in Shenzhen, China.
We were finally ready to go into production!
Finishing Touches
When we receive the buckles, we have them tumbled to remove any sharp edges and to polish the surfaces. We finish the buckles and brush the face in shop, using an edge sander.
Tumbling involves passing the buckles through a large, vibrating canister full of ceramic bits like these. The burs and slight imperfections on the buckle are smoothed away.


When we receive the straps from our partner, we laser engrave our logo and the size onto the inside. The buckles are then paired with the straps, and they’re sent out from our shop.
The design is rooted in functionality. It’s easy to use. It’s visually clean. And it’s incredibly durable. These features are intrinsic to the materials and construction we used—it’s not augmented by anything. We had to dig deep to find the courage to dive into designing a fashion item—but we’re happy that we did!
The design is rooted in functionality. It’s easy to use. It’s visually clean. And it’s incredibly durable. These features are intrinsic to the materials and construction we used—it’s not augmented by anything. We had to dig deep to find the courage to dive into designing a fashion item—but we’re happy that we did!
Shop The Minimalist Belt


Modular Design
Get all four different belt styles in one convenient kit. Swap buckles and straps at will to dial in your outfit.
SHOP THE KIT